SchemaMapper III: Great Power. Great Responsibility.


Hi FME’ers
Here’s a third post on the SchemaMapper transformer.
In the first post we mapped attributes from one name to another, and in the second we mapped feature types from one name to another.
But both of these were simple one to one mappings. Now let’s carry out some mappings based on specific conditions.
Reminder
Remember that Schema is the FME term for what you might call data model. The source schema is “what we have” and the destination schema is “what we want to get”. The act of connecting the source schema to the destination, to fulfill the “what we want” aspect, is called Schema Mapping.
Usually Schema Mapping is done through connections in a workspace; but can alternatively be carried out by the SchemaMapper transformer.
Conditional Mapping with the SchemaMapper
Conditional mapping makes use of the SchemaMapper’s “Filter Field” dialog. It is basically a way to define a simple where clause.
For this example we’ll take the reverse case to the last posting. There we had Lakes and River features and wanted to merge them into a single Hydrography layer. Here I have a single Hydrography layer but want to divide it up into Lakes and Rivers.
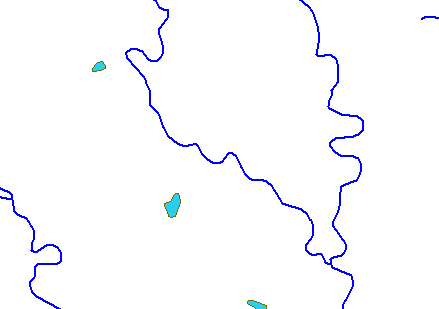
The source data is all on one layer and looks like this:
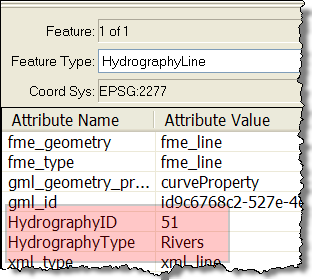
Current attributes are HydrographyID and HydrographyType. HydrographyType will have either the value “Rivers” or the value “Lakes”:
So, depending on the value of HydrographyType, I want to map my feature types to Rivers and Lakes and rename my attribute from HydrographyID to either RiverID or LakeID
Attribute Mapping: Lookup Table
To avoid complexity – which is the aim of these postings – all I’m going to do in this example is map the attributes. We’ll worry about conditional Feature Type mapping later, since it isn’t quite as simple.
So, using the lookup file from the first posting, you can assume the mapping will be similar to:
SourceAttribute,DestinationAttribute
HydrographyID,RiverID
HydrographyID,LakeID
The problem there is that I have HydrographyID defined as a source twice. What I need to do is add a clause stating when to use which definition. This will look like:
SourceTypeAttribute,SourceTypeValue,SourceAttribute,DestinationAttribute
HydrographyType,Rivers,HydrographyID,RiverID
HydrographyType,Lakes,HydrographyID,LakeID
ie, where HydrographyType = Rivers, then HydrographyID becomes RiverID
but, where HydrographyType = Lakes, then HydrographyID becomes LakeID
Fairly simple, eh?
Attribute Mapping: SchemaMapper Definition
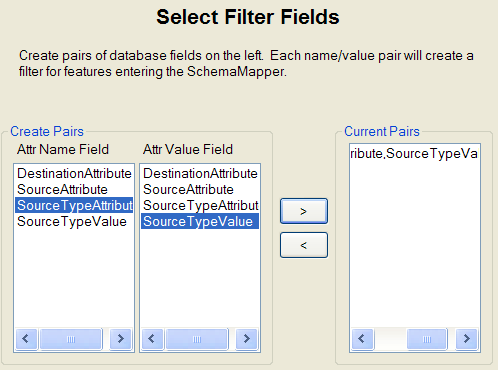
So that’s the lookup table. In the SchemaMapper it would look like this. Here’s the Filter Fields dialog, where we define the clause where Hydrography Attribute = Hydrography Value:
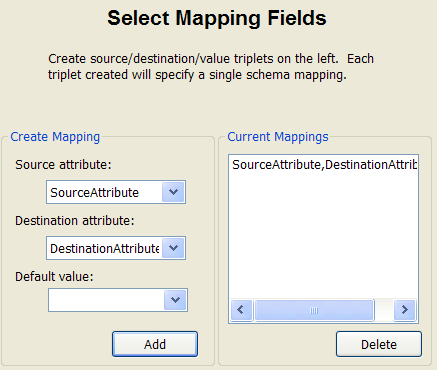
…and here’s the Mapping Fields dialog where we define the action to take:
Don’t forget to press the “Add” button (like I did) else your clause(s) won’t be saved and the mapping will fail!
Feature Type Mapping
Like I said, I’m going to leave doing conditional Feature Type mapping for the next post. The SchemaMapper dragon might not like it, but in the above example, since I have a defined attribute which already tells me what the Feature Type should be, I can simply use an AttributeFilter transformer like so:
Notice that the destination attributes are again still flagged as unconnected, but that’s only because Workbench doesn’t know I’ve made the correct mappings. When I run the workspace the output is correct. If I was really picky I could use the AttributeExposer transformer to expose my new attributes, but that sort of defeats the dynamic style of the SchemaMapper.
Benefits
To summarize what the benefits are in this example, well we’ve cut out a chunk of hard-coded workspace by using the Filter Field. Without this we’d have to divide the data up and map each set of attributes separately. OK, that wouldn’t be a huge problem in this example, but you won’t always work with data which is structured so simply. Plus this gives you the first step towards making a fully dynamic workspace.
Below: See? When you hard-code schema mapping you make the SchemaMapper dragon cry!
I think this is a good place to stop again. In the next post I’ll demonstrate how to use the Filter Fields dialog to set up conditional Feature Type mappings.

