 This article is a simple guide to bulk database updates with FME.
Sometimes my blog posts are like a courtroom novel. The recent article on precision is an example of this. I reach a successful verdict, but getting there involves an opening statement, a journey through obscure aspects of theory, cross-examining our functionality, and making a final argument for various design decisions. Only after all that can I prove beyond doubt that our work is fit for purpose.
That sort of article is fun to write and it does illustrate Safe’s thought processes in designing FME functionality. But sometimes – like reading a courtroom novel – you want to skip to the final chapter. You just want the juicy part where our hero attorney has already got the result, and simply illuminates the solution in logical steps.
Well, today, I am that hero attorney. I am the Perry Mason of the FME world, and this article is the final chapter of “Updating Databases with FME”. No theory or cross examination involved. Step by step I’ll cast light on how FME made it easy to push mass updates to a database.
There is just one design issue I’ll touch on, and it is important. In law there are multiple jurisdictions, and a technique Perry Mason tries in a California court may not work for Atticus Finch in Alabama. Similarly, in our world of data there are multiple databases. But! FME techniques you use for Oracle will work for SQL Server, and FME techniques you use for Postgres will work for an Esri Geodatabase.
How can this happen? It’s because we’ve worked really hard to harmonize (or standardize) the interfaces inside FME. So whatever database applies in your jurisdiction – or even if your work involves several database types – this post covers you.
So let’s get on with it…
![]()
Setting up an FME Database Connection
When you want to read to or write from a database – including database updates – you need authorization. FME defines authorization parameters using a connection tool. It’s accessed through Tools > FME Options in FME Workbench. So start Workbench, select Tools > FME Options and you will get this dialog:
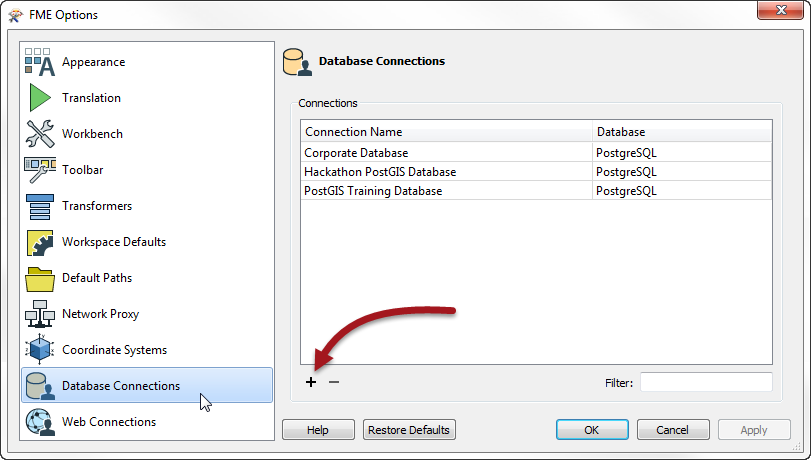
When I click on Database Connections, I get a list of available connections. If I want to create a new one I press the plus button and get this dialog:
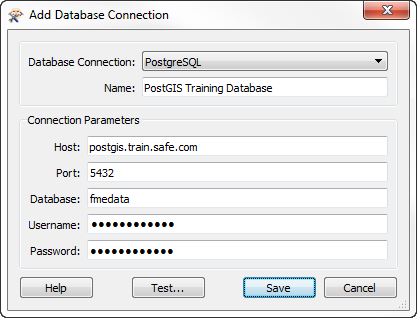
Just enter your database details in there, test and then save. Now you have a connection defined, you can use it wherever you like in FME. So first let’s use it to insert some data into a database…
![]()
Inserting Data to a Database with FME
To carry out database updates, first you need data in the database! Let’s say you want to read a dataset – maybe an Excel spreadsheet – and write it to a database, creating a table at the same time. That’s simply done in FME by generating a new workspace and choosing a database format. The generate option exists on the start page of FME Workbench, or you can use the shortcut Ctrl+G. That opens the basic dialog for defining a translation:
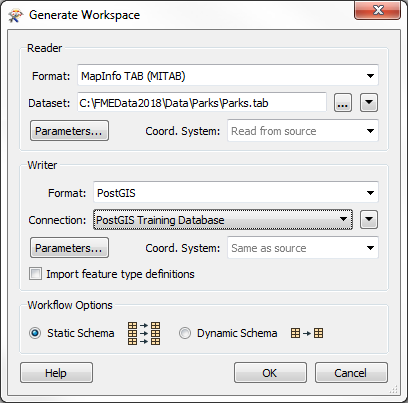
Here I have filled in the fields to define a translation of data about parks in the city of Vancouver. The translation is from MapInfo TAB (a spatial data format) to PostGIS (a standard PostgreSQL database with a spatial extension). The spatial part is not necessary – the same setup works for data without a spatial component – but maps are cool so I’ll go with it.
The database connection I selected is the one I defined above, saving me the effort of re-entering my authentication details.
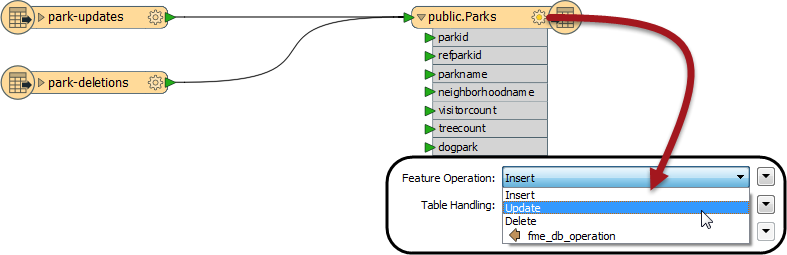
Click OK and that dialog creates a workspace that looks like this:
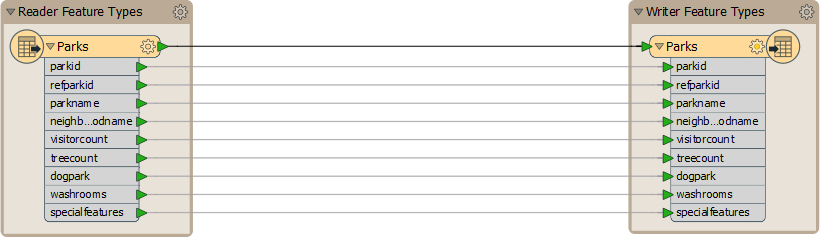
Each object on the left is a table, layer or class in your source data. Each object on the right is a table in your database.
Setting Database Parameters
When using databases the key settings for each table are accessed by clicking the cogwheel icon on those objects, like this:
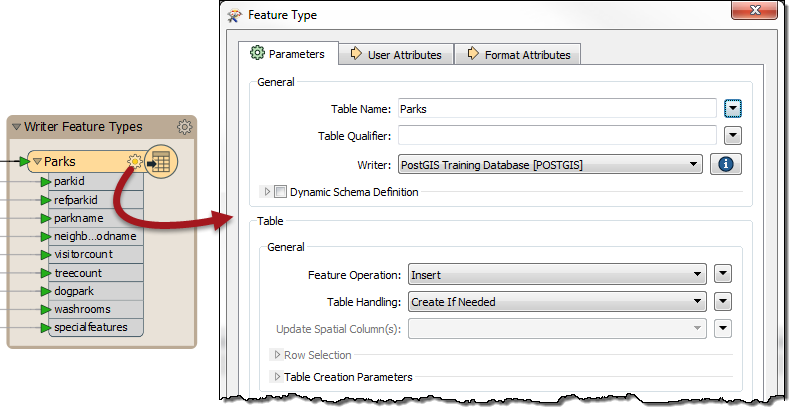
The table name is the first parameter, and so I can rename the table to be something different; and I can choose which schema (Table Qualifier) to write to as well.
But the most important parameter (Feature Operation) tells us that we are INSERTing data, and I can also choose in what way the table is created:
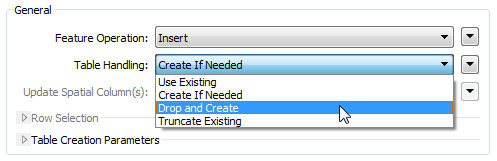
So I can choose to create the table regardless of if it exists (Drop and Create), create it if it doesn’t already exist (Create if Needed), just add to the existing table (Use Existing), or empty it if it already exists (Truncate Existing).
Which I use depends on the scenario I am working through, but in this case – to create and fill a table – I’ll use Create if Needed. The advantage over Drop and Create is that if another user already has a table with that name (and I haven’t checked) then at least I won’t delete their content first.
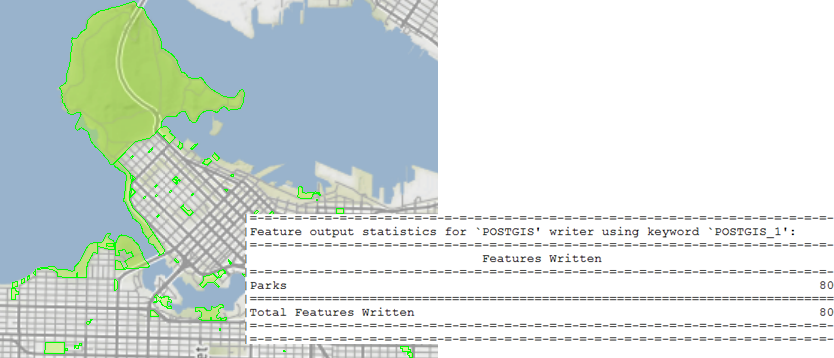
Anyway, I run the workspace and FME loads the data:
Of course, at some point in the future I might find the source of the data (Parks.tab) has changed, and I need to update my data based on that changed dataset…
![]()
Updating Records in a Database with FME
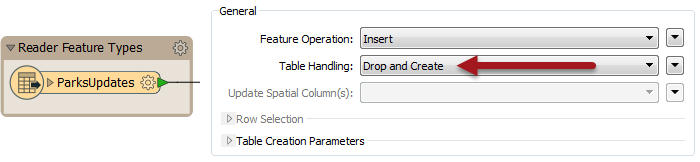
Say I receive a dataset named ParksUpdates.tab. The simplest way to update my database is to do the same process as above, but to use Drop and Create as the table operation. That way I am just replacing everything:
But that relies on ParksUpdates.tab being the FULL replacement dataset. What if it only includes the records that need an update? Well in that scenario I simply change the operation to UPDATE (instead of INSERT) and choose to Use Existing table:
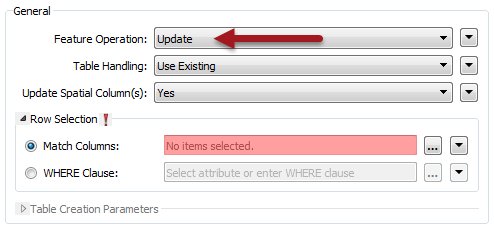
Notice that when I pick UPDATE, then another parameter becomes available to me: Match Columns. I need this to define which feature updates which record. In this case I have an attribute called parkid in my source data and a field (column) named parkid in my database table; so that’s the attribute I select:

So if an incoming feature has the attribute parkid=13, then its contents are used to update the database record where parkid=13.
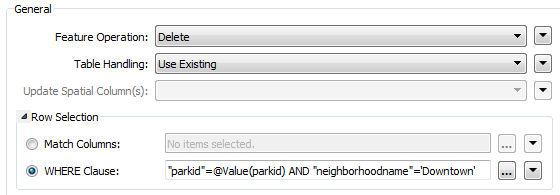
That’s simple enough, but to add a little complexity (not too much) there is also a WHERE clause I can use instead. This lets me define the match where the attribute and field names are not the same (for example ParkNumber and parkid) but also allows me to add extra conditions using field names:

Here, for example, I’m updating records where ParkNumber = parkid, but also only where the neighborhoodname field is “Downtown”. So records outside of the Downtown area aren’t updated, even if the park ID matches. I could do a similar test for a status field (active, inactive) among many other examples.
So we do updates here, and that’s simple enough; but sometimes we also want to delete records…
![]()
Deleting Records from a Database with FME
Let’s assume my UpdatedParks dataset is a list of records to delete from the database table, not add. To do that I simply change the operation from UPDATE to DELETE:
I get the same Match Column parameter (or WHERE clause) to define which incoming features should delete which existing records, and this is again easy to define.
So deletes are no more complex than updates; the key question is what happens when I want to both delete and update records simultaneously?
![]()
Updating AND Deleting Database Records with FME
Let’s say some of the incoming records are updates, while others are deletions:
Obviously I can’t set the operation parameter to both DELETE and UPDATE for the entire table. What I do instead is tag each feature with the operation it will carry out. I do this using an attribute called fme_db_operation:
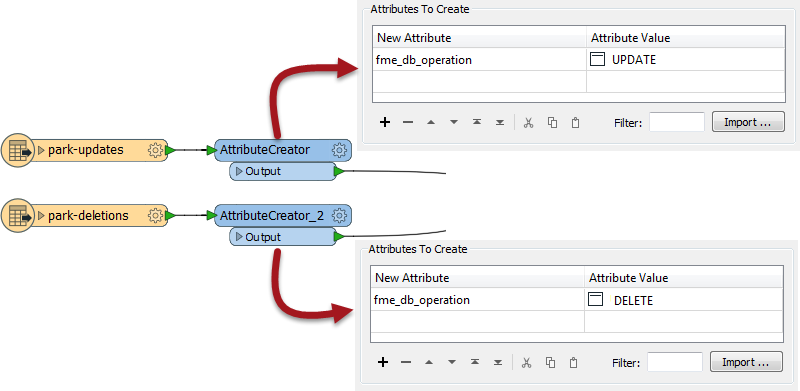
You can see here that I have added an attribute to each stream of data, using an AttributeCreator transformer. The attribute name is fme_db_operation. For one lot of data I set the value to UPDATE. The other set of data has a value of DELETE. This is how I tag each feature with its own operation.
I still have to set the operation type on the table itself. But this time, rather than choosing Insert, Update, or Delete, I choose the option labelled fme_db_operation:
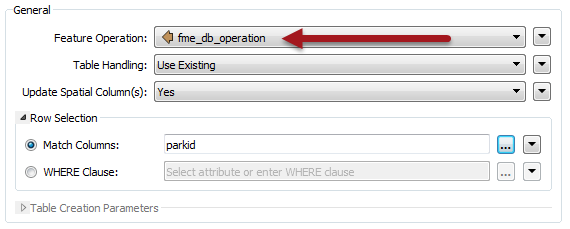
Now when I run the workspace, the features tagged UPDATE update database records, while the features tagged DELETE delete database records. The Match Column (or WHERE clause) provides a match between features and records.
The one assumption is that we already know which feature are deletes and which are updates. In the above example, the source data is already divided into two. If we aren’t sure of that then we might need to do what is called Change Detection…
![]()
Change Detection and Database Updates with FME
Change Detection is where we have a new dataset and want to compare it to existing records to find what has changed. Here is such a workspace:
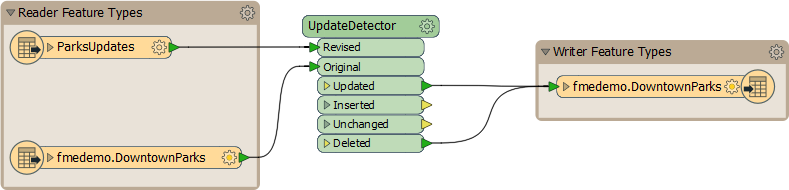
It looks quite simple, and in fact it is. I have added a reader (Readers > Add Reader) to read the existing contents of my database table, and an UpdateDetector transformer to compare these records to the UpdatedParks dataset, to identify where changes have occurred. I can detect changes either on field values, or spatial contents, or both.
Then it’s just a case of writing the results back to the database table. I don’t even need to create the fme_db_operation attribute; the UpdateDetector has done that for me. I must just check that the table is set with the correct operation (fme_db_operation) and that Match Column is set.
At this point you probably know more than enough to carry out database updates; but there is one more scenario I can perhaps mention. What if each feature has a different match column? In that case you can write your match in the form of a where clause, and store it as an attribute. Then use that attribute for the match in the table parameters:

…just like that!
NOTE: In FME2019 the ChangeDetector has undergone various improvements and should be your go-to transformer instead of the UpdateDetector.
![]()
Wrap Up
I hope that was a good explanation for database updates, short on theory and long on practical examples. Speaking of which, we have an online tutorial on database updates, where you can carry out exercises, step by step, using similar examples to what I showed today. So if you want to try some of these techniques in a safe practice environment, click the above link to visit the tutorial.
As I mentioned, although I used Postgres here, most of our database formats use an identical interface because we’ve invested a lot of time standardizing them all. That work is still ongoing, so one of the tutorial articles includes a list of standardized formats, and what to do if your format is not yet updated.
And now, if you’ll excuse me, I’m going to do like Perry Mason and wrap up my case by going out to celebrate with steak and cocktails!

PS: Safe Software now has an Instagram page. I’m not sure what an instagram is, but here’s a picture of me presenting at a prior user conference (oh, and riding an inflatable horse):


Mark Ireland
Mark, aka iMark, is the FME Evangelist (est. 2004) and has a passion for FME Training. He likes being able to help people understand and use technology in new and interesting ways. One of his other passions is football (aka. Soccer). He likes both technology and soccer so much that he wrote an article about the two together! Who would’ve thought? (Answer: iMark)